Good morning lovelies! Hope you are having a wonderful Tuesday. Today I have a review of a product I was introduced to at the Tips & Sips Cocktail after party while I was in Las Vegas for CosmoProf. I hadn't heard of Mini Mani Moo before but I am familiar with liquid latex and it's use for all things nail art. The company, based out of Texas, is all about making nail art easy for everyone. Not only can you use the Liquid Tape for easy nail art clean up, you can also use it as a peel off base coat (I haven't tried it this way yet). Mini Mani Moo ships worldwide (some restrictions may apply). Not only is Liquid Tape available on the Mini Mani Moo website, but you can also pick up polish, stampers, water decals and topcoat. Mini Mani Moo can be purchased on Amazon ($8.90) and the Mini Mani Moo website ($9.90). Let's jump in and check this stuff out!
*press sample*
So here's Liquid Tape. It's much like other liquid latex products that are currently available on the market. What makes it different is 1 - it's applicator and 2 - it's scent. I haven't seen a doe foot applicator and I found it very easy to use. I had more control over where the latex went on my fingers. I think I need to practice with it again and use a heavier hand applying it as I feel I didn't have enough latex on my fingers and ended up cleaning up more than I wanted to with acetone. The scent when wet is the typical latex smell, but not overly powerful. But once dry it smells like coconut - very pleasant. The 2 things I would recommend to a Liquid Tape user are to swipe on a nice heavy layer to make sure everything is covered well and to make sure to not get any on your actual nail (if you are only using it for easy clean up) because you will pull up the polish - as I did in a few places. Other than those 2 user errors I did enjoy Mini Mani Moo Liquid Tape. It's ease of use and availability on a huge reseller like Amazon make it an easy choice. It's very affordable as well. I will definitely be using Liquid Tape again!
Here's a bottle shot of the product. Don't mind my polish-messy towel, that thing gets good use during nail art and swatching time.
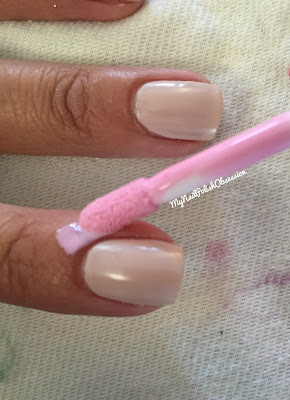
Here's a nice pic of the doe foot applicator. It was very easy to work with, I didn't have any latex end up pooling in my cuticles which was nice.
The next 2 pictures show, again, how easy the doe foot applicator was to use. I'd suggest getting more product on the applicator OR going over your skin twice to ensure everything is covered well.
Here's the gradient ready to go on the sponge applicator and the actual application.
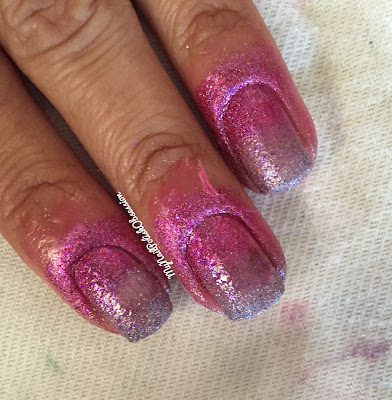
First layer of of the gradient is very light and sparse. I went over a few times to darken things up and completely cover my nails. But you can already see how the Liquid Tape is going to save me from endless glitter clean up with a brush and acetone.
Completed gradient. Messy fingers. Let's see the clean up.
The next 2 pictures show how easy it is to just peel the Liquid Tape off. You simply lift up the Liquid Tape at an edge and continue to pull it off. You can use tweezers to peel it off or just your finger. It's very easy to remove.
And here's my gradient, all the Liquid Tape is off. You can see a few spots that still have polish on them - as I mentioned before, I should have put on a thicker coat or doubled up. But the amount of clean up is nothing compared to what it would have been if I'd done the gradient on my bare skin!
And just so you can see what the finished gradient looks like in the sunlight - sparkly, pretty and clean!


No comments:
Post a Comment