Showing posts with label 4th of july. Show all posts

Monday, July 4, 2016

Happy 4th of July!

Good evening!  Happy 4th of July!  Some of you are probably getting ready for fireworks, how exciting!  It's only 6pm here but we are probably just going to stay home and avoid all the madness and crowds.  Besides, we've enjoyed a nice relaxing day at home, watching movies (Independence Day of course) and playing on the slip n slide.  I threw together a quick mani and am pretty pleased with how it turned out.  So feel free to head over to my Facebook page and share your 4th of July manis there, I'd love to see them.  Now let's check out what I've got on.

*polishes in this post were press samples*

Different Dimension:  ShopFacebookInstagram
Painted Polish: Shop, Facebook, Instagram
Barielle:  Website/ShopFacebookInstagramTwitter 
Salon Perfect: Shop, Facebook, Instagram, Twitter
Sinful Colors: WebsiteFacebookInstagramTwitter

Tuesday, June 30, 2015

Red Dog Designs Red, White & BOOM!

It's getting late, I know I know!  But I have one more polish to share with you tonight.  I'll admit, the summer has me pretty busy with kids and activities and enjoying some leisurely down time.  So I've got to get in posts when I can!  Hope you don't hide too much.  Well I wanted to share this one because if you are looking for a polish for Saturday and possibly get rush shipping you can get this one in time!  Red Dog Designs just released Red, White & BOOM! in her shop and it's a really awesome polish.  Even if you can't get it for the 4th, you will love it for any other patriotic holiday that calls for red, white and blue!  You can get Red, White & BOOM! now and it's $10.  Let's check it out!

*press sample*

Red Dog Designs: ShopFacebookInstagram

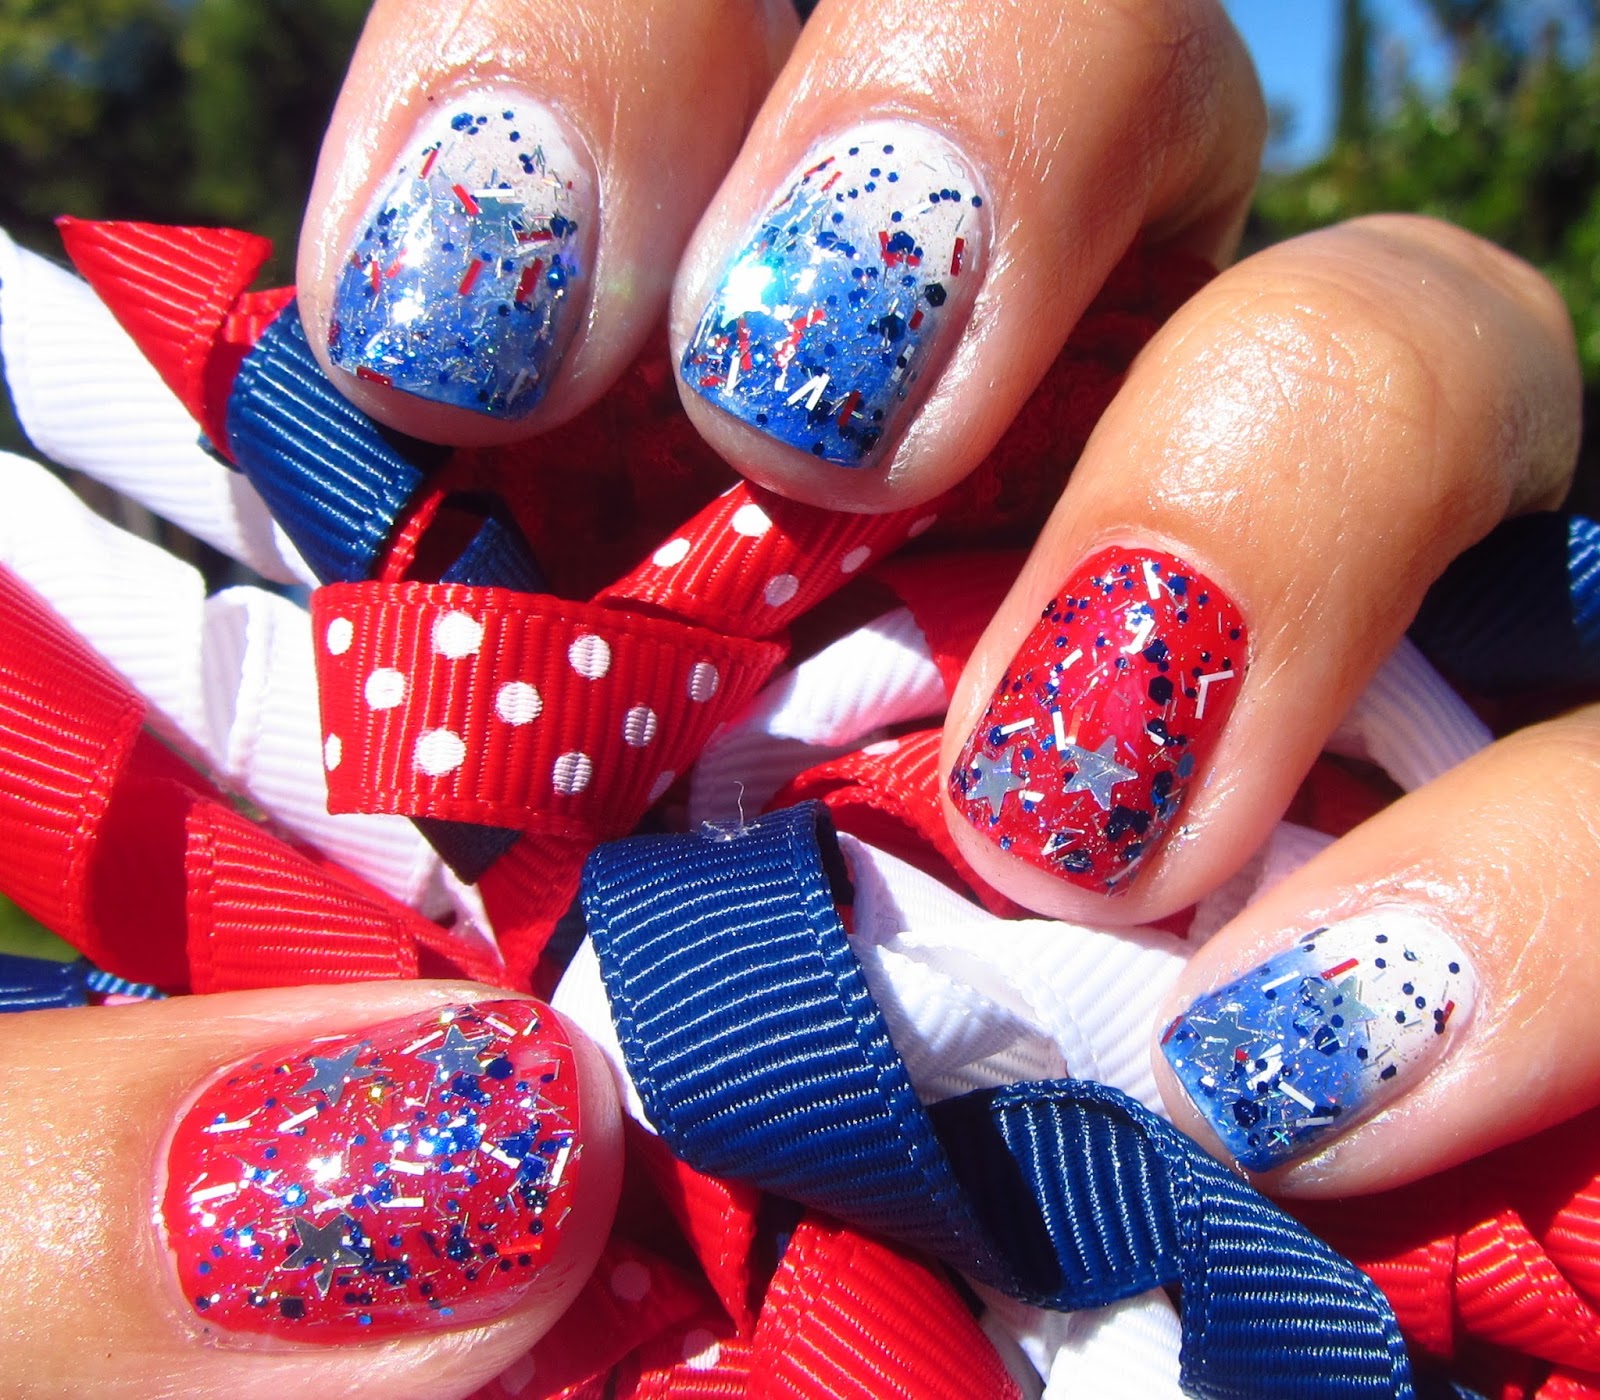
Red, White & BOOM! is a mix of "various sized hex glitters, in shades of holo blue, holo red and white; with mini white stars, sprinkle with navy and holo micro glitters."  This is a full coverage glitter.  You do not need a base coat to build up to opacity.  Though you could use a base color and go for a lighter glitter look.  But if I'm going glitter I like to go big so I layer it on itself.  Red, White & BOOM! is actually a thick formula, because of all the glitter in the polish.  But it's not difficult to manage and I only needed 2 coats to completely cover my nails.  The only thing I would note is that any stars you pull out in the first coat will get covered in the next.  So either try paint around the stars to not cover them, or only get them on your nails in the last coat.  I topped my mani with 2 layers of topcoat for a smooth to the touch finish.  

Red Dog Designs Red, White & BOOM!

Red Dog Designs Red, White & BOOM!

Red Dog Designs Red, White & BOOM!

Red Dog Designs Red, White & BOOM!


Pin It
Instagram

Thursday, June 4, 2015

LOOK Nail Color LOOK Proud, 4th of July Collection

Good afternoon!  Hope your Thursday is going well!  I found myself running around taking care of errands and I forgot to eat lunch, oops!  My kids are down to their last 4 days of school and I can't believe how much has been going on in the past few weeks.  I will definitely embrace the summer with a big sigh of relief and a tall glass of frozen adult beverage.  Today I have a new to me brand to share with you.  LOOK Nail Color is a brand that you can find in your local drugstores and they promote self-expression with nail color and nail art!  There are currently a few collections available as well as a nail art kit that comes with art brushes and dotting tools.  The collection I received to review is LOOK Proud, the 4th of July set.  Of course this means it consists of red, white and blue!  LOOK Proud hit Walgreen's shelves on 5/1/15 and are $6.99 each!  I happened into my local Wags and saw the full display sitting there looking quite inviting!  Let's jump in and talk about polish, you ready?
*press sample*
LOOK Nail Color: Website, Facebook, Instagram, Pinterest, Twitter
Here was the display in my local Walgreen's...
LOOK Nail Color LOOK Proud

I received Oh Say Can You See, Rocket's Red Glare and Broad Stripes Bright Stars for review.  I enjoyed the bottle shape and the shorter brush, which made for easy handing when I did art.  
LOOK Nail Color LOOK Proud

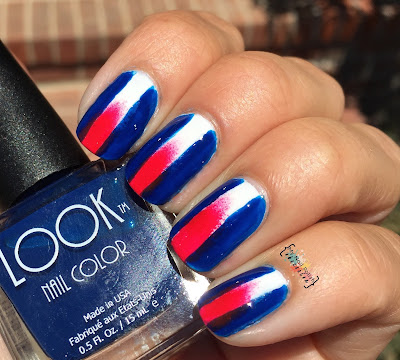
Since LOOK encourages nail art I thought that's what I'd do!  I did 2 very simple nail art styles and am sharing them now.  For this mani I started with 2 coats of Broad Stripes Bright Stars.  It's a nice creamy white that wasn't chalky or patchy.  It covered well and made for a great base for my art.  I then used Oh Say Can You See, a royal blue jelly.  You would need about 3 coats to build up the opacity on this polish, but it had a very glossy finish.  I free handed the 2 thick stripes on my nails.  I then sponged Rocket's Red Glare, a red jelly, onto the tips of my nails, trying to stay within the white area.  This jelly was a bit more full coverage, but it would still probably take 3 coats.  I finished with 1 layer of topcoat.  

LOOK Nail Color LOOK Proud

LOOK Nail Color LOOK Proud

LOOK Nail Color LOOK Proud

LOOK Nail Color LOOK Proud

This second look is my favorite of the 2.  I decided to do a splatter mani.  So messy, but I haven't done one in ages.  Once again I started with Broad Stripes Bright Stars because it really makes a prefect base for nail art.  I used ellagee Likety Split Latex Mani Mask to cover my fingers and help keep the mess at bay.  

LOOK Nail Color LOOK Proud

The next step for the splatter mani is to get a straw.  I cut mine in half to make for easier handling.  You'll need 1 straw per color you are using.  You will also want a paper plate to "splatter" over.  

LOOK Nail Color LOOK Proud

Dip your straw into the polish getting a good amount into the tip.  

LOOK Nail Color LOOK Proud

Hold the straw over 1 nail (over the paper plate of course) and....blow!  Blow hard enough to cause the polish to fly out all over your nail in random blobs and drops.  Re-dip the straw and do it again for each nail.  Below is my picture of each nail after the splatter treatment with Oh Say Can You See.  

LOOK Nail Color LOOK Proud

Here's another picture showing what my nails (and fingers) looked like after being splattered with Rocket's Red Glare.  

LOOK Nail Color LOOK Proud

After removing the latex and a little clean up here's what I created!  I did finish it up with a layer of topcoat.  You want to make sure everything is nice and dry before using topcoat so you don't smear any of the colors.  I think it's a super fun way to show off your patriotic side and celebrate the holiday.  

LOOK Nail Color LOOK Proud

LOOK Nail Color LOOK Proud

LOOK Nail Color LOOK Proud

LOOK Nail Color LOOK Proud
Pin It
Instagram

Thursday, July 4, 2013

Happy 4th of July!

Happy 4th of July!!  I love this holiday!  It's so fun with all the BBQ's, family get togethers, parades, and fireworks.  It's also my little brother's birthday, yay!  Happy birthday Will!  <3  I have 2 patriotic manis to show you…here's the first!

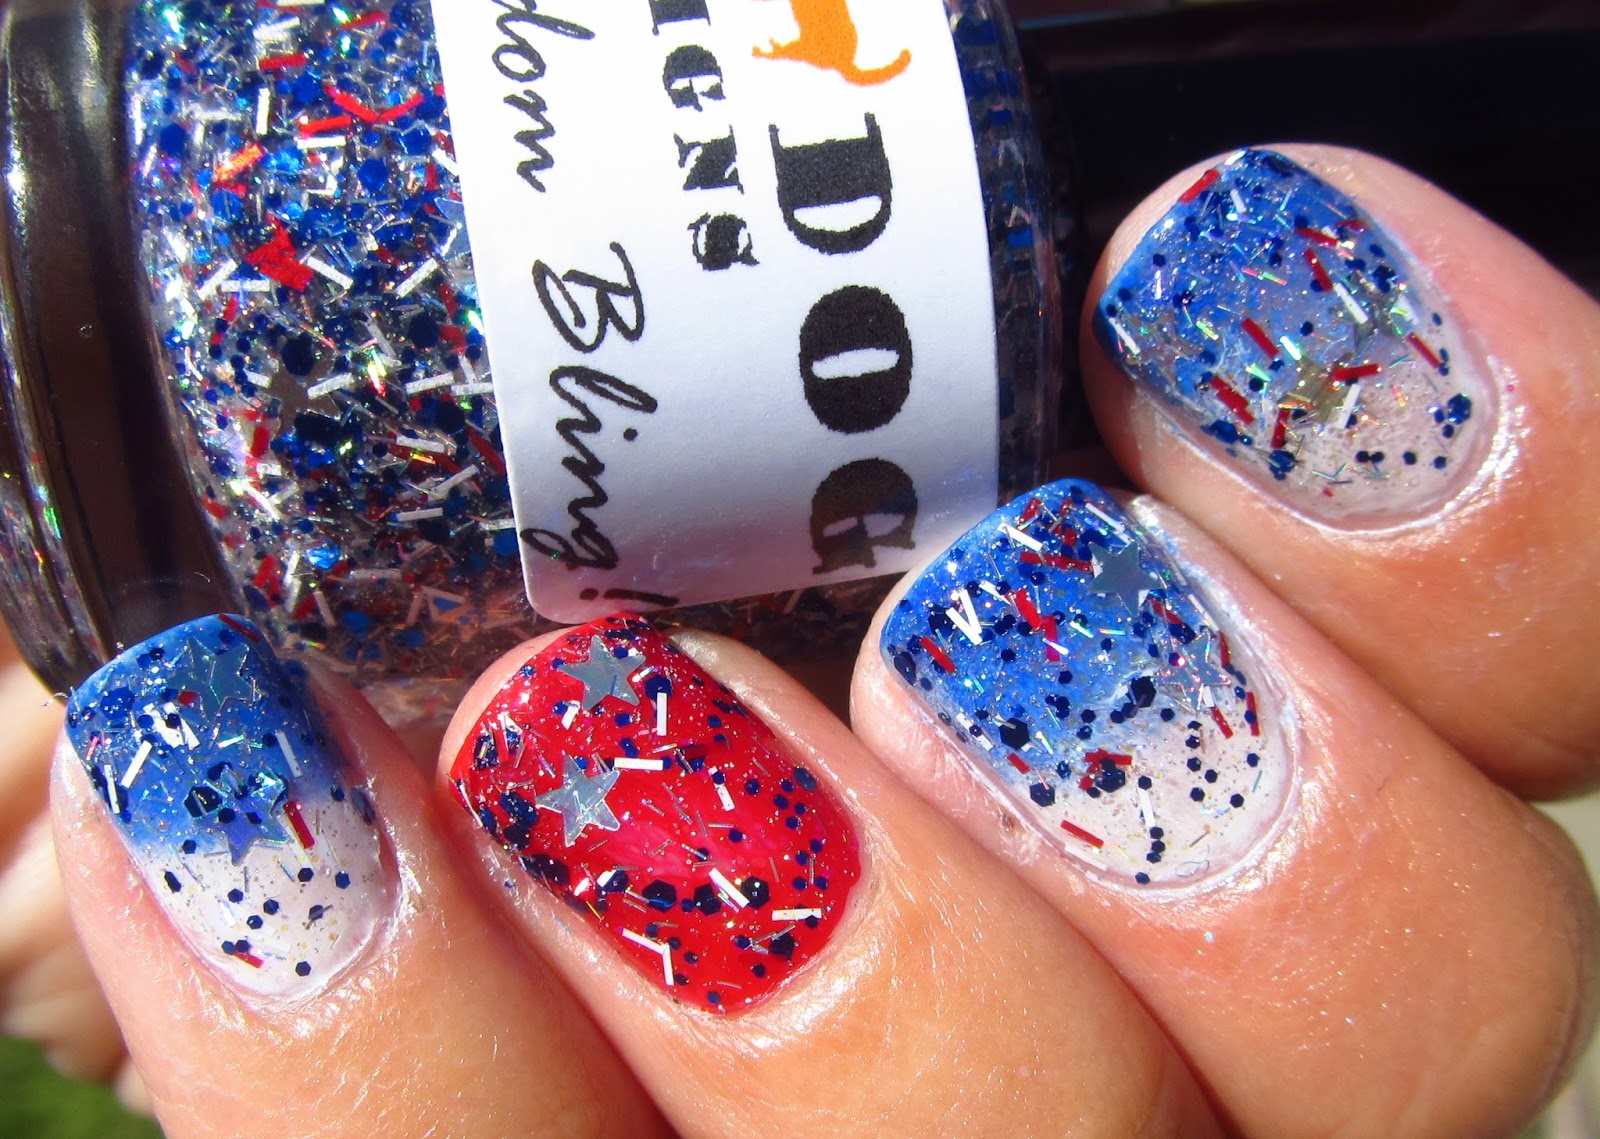
I am very proud of how this mani turned out!  I am starting to really love gradients!  Though I need to figure out a way to not be so messy!  I actually tried the tape method (cover the skin surrounding your nails with tape so the sponge gets polish on the tape, not your skin) with this one and still looked like a toddler painted all over my fingers.  Next time I'll try the glue method (brush white elmers glue on the skin surrounding your nails, let dry completely, and when you are done doing your gradient peel or wash off the glue).  I created this gradient with OPI Apine Snow and Sinful Colors Endless Blue.  I did 4 "coats" of gradient.  My thumb and ring finger are 1 coat of NOPI Challenge Red-Y, a red creme polish that I got from a Kellogg's Special K promotion.  I topped all nails with 2 coats of Red Dog Designs Let Freedom Bling.  LFB is a stunning blend of silver holo stars, red and blue mini bars, small glitter hexs and micro holo glitter!   LFB really made this mani special for me!  As with all the Red Dogs I've worn - the formula and application were amazing!  I finished with 1 layer of topcoat for smooth nails.  

You can still purchase Red Dog Designs Let Freedom Bling!  But you'd better hurry because it's only available through the end of July!  Red Dog Designs is on Facebook and Instagram (reddogdesigns) and you can purchase at the SHOP.  


Pin It

Tuesday, January 29, 2013

Shimmer Polish Nichole + OPI Swimsuit…Nailed It!

My best friend loves everything about the 4th of July; the colors, parades, bbq's, fireworks.  When I put this mani combination on all I could think of was her!  Does this not scream the 4th?  I think it does and I know this will make a perfect holiday mani come July!  

I started with OPI Swimsuit...Nailed It! which was gifted to me by Danielle over at Polish. Glitter. Rock & Roll.  It's a gorgeous royal blue with a foil finish.  Application for SNI was easy and I had full coverage in 2 coats.  I then sponged Shimmer Polish Nichole up by the cuticles.  Nichole is described as a red, silver and blue glitter mix (hello perfect for the 4th of July!).  I used 2 coats via the sponging method.  Nichole went on easily, much like all the other Shimmers I have worn.  Great formula, great glitter pay-off and loads of bling.  I used 1 layer of topcoat for smooth to the touch nails.

You can follow Shimmer Polish on Facebook and the Shimmer Polish Blog.  You can purchase Nichole and other sparkly creations from the Shimmer Polish Etsy store.

Please give me a follow me on Facebook and Instagram!


*the Shimmer Polish was provided for my honest opinion and review

Pin It