Tuesday, July 21, 2015

Mini Mani Moo Liquid Tape Review

Good morning lovelies!  Hope you are having a wonderful Tuesday.  Today I have a review of a product I was introduced to at the Tips & Sips Cocktail after party while I was in Las Vegas for CosmoProf.  I hadn't heard of Mini Mani Moo before but I am familiar with liquid latex and it's use for all things nail art.  The company, based out of Texas, is all about making nail art easy for everyone.  Not only can you use the Liquid Tape for easy nail art clean up, you can also use it as a peel off base coat (I haven't tried it this way yet).  Mini Mani Moo ships worldwide (some restrictions may apply).  Not only is Liquid Tape available on the Mini Mani Moo website, but you can also pick up polish, stampers, water decals and topcoat.  Mini Mani Moo can be purchased on Amazon ($8.90) and the Mini Mani Moo website ($9.90).  Let's jump in and check this stuff out!  

*press sample*


So here's Liquid Tape.  It's much like other liquid latex products that are currently available on the market.  What makes it different is 1 - it's applicator and 2 - it's scent.  I haven't seen a doe foot applicator and I found it very easy to use.  I had more control over where the latex went on my fingers.  I think I need to practice with it again and use a heavier hand applying it as I feel I didn't have enough latex on my fingers and ended up cleaning up more than I wanted to with acetone.  The scent when wet is the typical latex smell, but not overly powerful.  But once dry it smells like coconut - very pleasant.  The 2 things I would recommend to a Liquid Tape user are to swipe on a nice heavy layer to make sure everything is covered well and to make sure to not get any on your actual nail (if you are only using it for easy clean up) because you will pull up the polish - as I did in a few places.  Other than those 2 user errors I did enjoy Mini Mani Moo Liquid Tape.  It's ease of use and availability on a huge reseller like Amazon make it an easy choice.  It's very affordable as well.  I will definitely be using Liquid Tape again!  

Here's a bottle shot of the product.  Don't mind my polish-messy towel, that thing gets good use during nail art and swatching time.  

Mini Mani Moo Liquid Tape

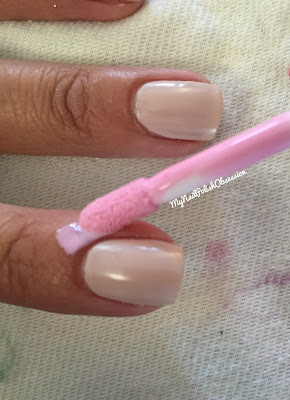
Here's a nice pic of the doe foot applicator.  It was very easy to work with, I didn't have any latex end up pooling in my cuticles which was nice.  

Mini Mani Moo Liquid Tape

The next 2 pictures show, again, how easy the doe foot applicator was to use.  I'd suggest getting more product on the applicator OR going over your skin twice to ensure everything is covered well.  

Mini Mani Moo Liquid Tape

Mini Mani Moo Liquid Tape

Here's the gradient ready to go on the sponge applicator and the actual application.

Mini Mani Moo Liquid Tape

Mini Mani Moo Liquid Tape

First layer of of the gradient is very light and sparse.  I went over a few times to darken things up and completely cover my nails.  But you can already see how the Liquid Tape is going to save me from endless glitter clean up with a brush and acetone.  

Mini Mani Moo Liquid Tape

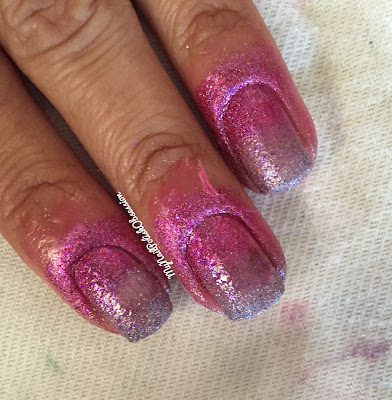
Completed gradient.  Messy fingers.  Let's see the clean up.  

Mini Mani Moo Liquid Tape

The next 2 pictures show how easy it is to just peel the Liquid Tape off.  You simply lift up the Liquid Tape at an edge and continue to pull it off.  You can use tweezers to peel it off or just your finger.  It's very easy to remove.  

Mini Mani Moo Liquid Tape

Mini Mani Moo Liquid Tape

And here's my gradient, all the Liquid Tape is off.  You can see a few spots that still have polish on them - as I mentioned before, I should have put on a thicker coat or doubled up.  But the amount of clean up is nothing compared to what it would have been if I'd done the gradient on my bare skin!  

Mini Mani Moo Liquid Tape

And just so you can see what the finished gradient looks like in the sunlight - sparkly, pretty and clean!  

Mini Mani Moo Liquid Tape

Pin It
Instagram

Monday, July 20, 2015

Girly Bits What Happens In Vegas...Ends Up On Snapchat

Aloha from Hawaii!  I am on vacation in paradise and enjoying it so far!  We arrived yesterday and our resort is just so beautiful.  Like they took paradise and made it even better.   I have a couple posts to share with you while I'm here and the first one is the newest addition to the Girly Bits What Happens in Vegas collection!  I reviewed the previous ones HERE and HERE and now I've got What Happens In Vegas...Ends Up On Snapchat!  I'll admit I have no idea what Snapchat is.  I thought it was for sharing pictures that get erased after a few seconds so I don't know how that works for social media sharing.  But maybe I'm just old and not hip anymore.  But what I do know is that this polish is AMAZING!  Now I don't have exact release date information, but I do know WHIVEUOS is Limited Edition and will be available for pre-order in early to mid August.  I pinky promise to update you with availability as soon as I hear something solid.  So let's jump in and check out this gorgeous polish!

*press sample*


Just thought you'd like to see all 3 of the What Happens In Vegas Ends Up On... polishes together!  Aren't they lovely?!  From Left to right they are in order of release: Facebook (2013), Instagram (2014) and Snapchat (2015).  I can't wait to see what next years addition will look like!  

Girly Bits What Happens In Vegas Ends Up On...

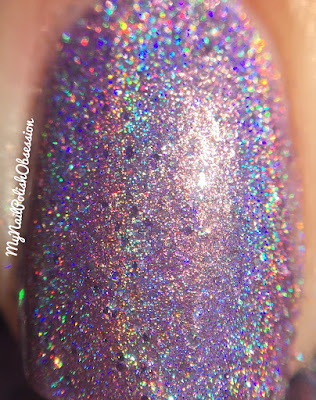
THIS is What Happens In Vegas...Ends Up On Snapchat!  Its a gorgeous soft, pastel purple linear holo with a helping of tiny silver holo glitters.  The formula and application were on point!  Creamy, opaque, smooth, buttery, fabulous, perfect...I can give you a slew of words describing how I felt about this polish.  I think you get the idea.  I used 2 coats for full coverage and finished with a layer of topcoat.  

Girly Bits What Happens In Vegas Ends Up On...Snapchat!

Girly Bits What Happens In Vegas Ends Up On...Snapchat!

Girly Bits What Happens In Vegas Ends Up On...Snapchat!

Girly Bits What Happens In Vegas Ends Up On...Snapchat!

Girly Bits What Happens In Vegas Ends Up On...Snapchat!

 *indirect natural light*
Girly Bits What Happens In Vegas Ends Up On...Snapchat!

I decided to use all 3 What Happens In Vegas Ends Up On... polishes to do a gradient!  It turned out so pretty!  I started with a base of Zoya Ana and then sponged on a few coats of the 3 WHIV polishes.  I have them sponged on from top to bottom: Instagram, Facebook and Snapchat.  The only one that didn't really want to show up to the party was WHIVEUO...Facebook.  I think it must just have a lighter pigment.  I topped this with 1 layer of topcoat.  

Girly Bits What Happens In Vegas Ends Up On... gradient

Girly Bits What Happens In Vegas Ends Up On... gradient

Pin It
Instagram

Sunday, July 19, 2015

Sweet Heart Polish Jubilee & Second Star to the Right

Good morning!  I have more polish swag to share with you today!  First I'll apologize if this post is brief, I am flying out for my Hawaiian vacation today and have a soccer game to get to first.  My body isn't really recovered from Vegas and soccer doesn't sound that great but since I signed up for the team I have a sense of responsibility to show up and play.  Anywho....I really wanted to share more awesome polish that I received at the indie after party, Cocktails & Colors.  I don't think I can say it enough but what a fantastic party it was!  It's just awesome to meet makers and bloggers.  It's a total fan-girl fest.  One maker that I now well and have hung out with is Cassandra from Sweet Heart Polish.  She's truly the biggest sweet heart I've ever met so her brand name is perfectly fitted.  And her polish!  Well you know I'm a fan.  The polish she included in the swag bags were both stunning!  The great news is she'll be releasing these 2 in her shop soon!  I'll let you know as soon as I hear when these will be available.  Now let's jump into pictures!

*press sample*

Sweet Heart Polish: ShopFacebookInstagramTwitter

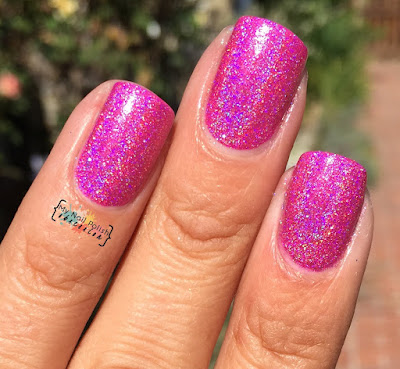
Up first is Jubilee.  This is a gorgeous deep pink linear holo.  It's got a light dose of red sparkle in there that's just gorgeous!  The formula and application of Jubilee were both perfect.  This polish was creamy and opaque and applied like a dream.  I only needed 2 coats of Jubilee for full coverage and a layer of topcoat to finish.  


Sweet Heart Polish Jubilee

Sweet Heart Polish Jubilee

Sweet Heart Polish Jubilee

Sweet Heart Polish Jubilee


*indirect natural light*
Sweet Heart Polish Jubilee

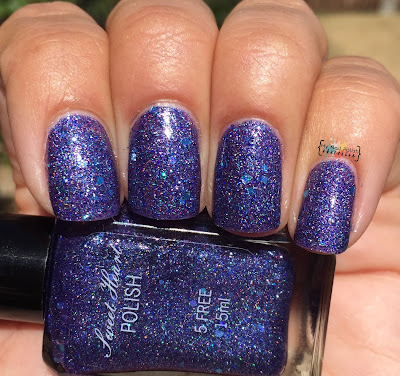
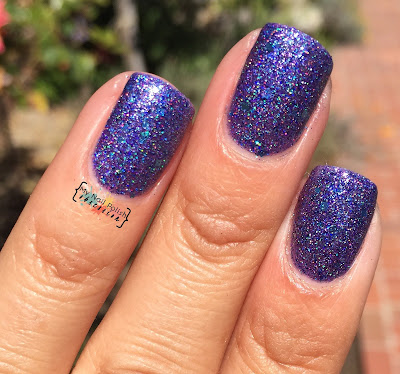
As much as I loved Jubilee, Second Star to the Right stole my heart.  This is a full coverage blurple glitter polish with tiny holo and iridescent glitters.  If you want uber sparkly then this is your polish!  I mean I was literally drooling on my nails here!  The formula and application were both great!  I used 3 layers of Second Star to the Right for full coverage.  You could also use 1 light coat over a base color for a totally different look!  I finished with a layer of topcoat.  

Sweet Heart Polish Second Star to the Right

Sweet Heart Polish Second Star to the Right

Sweet Heart Polish Second Star to the Right

Sweet Heart Polish Second Star to the Right

Sweet Heart Polish Second Star to the Right

*indirect natural light*
Sweet Heart Polish Second Star to the Right

Pin It
Instagram

Saturday, July 18, 2015

Different Dimension Cosmologically Speaking Part 2

Good morning!  Same old song and dance - I meant to get this post up last night but I just ran out of time. Ok truthfully I passed out for a 3 hour nap late in the day and fell behind on things to take care of.  This post.  That gigantic pile of laundry that needs to be folded (UGH).  Well I am still avoiding the laundry because I'd rather share these amazing holos with you!  Last year Different Dimension came out with the Cosmologically Speaking collection - full of holos, shimmers and micro glitters.  This year Missi is at it again and will be releasing Cosmologically Speaking Part 2, a collection of 6 gorgeous holos!  I received these in my blogger gift bag after attending the Cocktails & Colors indie event while I was out in Las Vegas to participate in the always awesome CosmoProf.  Well I have to say that I think the indie events not only rival the big convention, but they are even better because it's a great chance to meet makers and bloggers and really connect with them on a personal level.  I will share more of my feelings on that with you later when I start posting my coverage of all things CPNA.  For now I am ready to jump into holos, how about you?  
The Cosmologically Speaking Part 2 collection launches on 8/1.  You can get a 30% discount using the code CPNA2015.  Code expires 8/31/15.  

*press sample*


I went in alphabetical order this time (instead of rainbow order) and up first is Absolute Zero.  This is a silvery nude holo, kind of a champagne color.  It shows more silver in the direct sunlight.  It's a gorgeous linear holo with a smattering of holo micro glitters.  The formula and application were both excellent; smooth flowing, easily brushed on, no dragging.  I used 3 coats of Absolute Zero for full coverage.  I used 1 layer of topcoat to finish. 

Different Dimension Absolute Zero

Different Dimension Absolute Zero

Different Dimension Absolute Zero

Different Dimension Absolute Zero

Different Dimension Absolute Zero

 *indirect natural light*
Different Dimension Absolute Zero

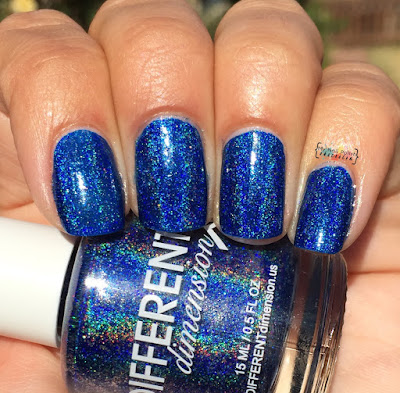
Blue Shift is WHOA!  It's a super rich, vibrant blue.  Of course it's a linear holo,  But it's also full of silvery holo micro glitter.  Guess what, this was a one coater!  It's so freaking pretty I was mesmerized by my nails when I had it on.  The formula and application of Blue Shift were both fabulous.  Creamy, opaque and totally fabulous.  I finished with a layer of topcoat.  

Different Dimension Blue Shift

Different Dimension Blue Shift

Different Dimension Blue Shift

Different Dimension Blue Shift

Different Dimension Blue Shift

 *indirect natural light*
Different Dimension Blue Shift

Cosmic Ray is a hot pink linear holo with a helping of silver holo micro glitters.  I love this color.  I felt like Barbie wearing it.  Again, the formula and application were both superb, no issues to report on this baby.  I used 2 coats of Cosmic Ray for full coverage and topped it with 1 layer of topcoat.   

Different Dimension Cosmic Ray

Different Dimension Cosmic Ray

Different Dimension Cosmic Ray

Different Dimension Cosmic Ray

Different Dimension Cosmic Ray

 *indirect natural light*
Different Dimension Cosmic Ray

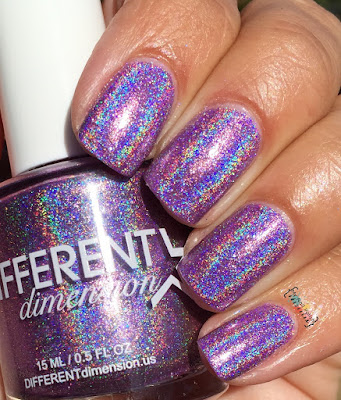
Moving along, here's Quasar.  This beauty is a stunning soft purple linear holo.  Quasar actually has blue sparks in it, that I didn't show off well at all (sorry).  When I first started painting with this I thought it was going to be sheer but it wasn't at all!  The formula was nice and opaque and built up perfectly in 2 coats.  I finished with a layer of topcoat.  

Different Dimension Quasar

Different Dimension Quasar

Different Dimension Quasar

Different Dimension Quasar

Different Dimension Quasar

 *indirect natural light*
Different Dimension Quasar

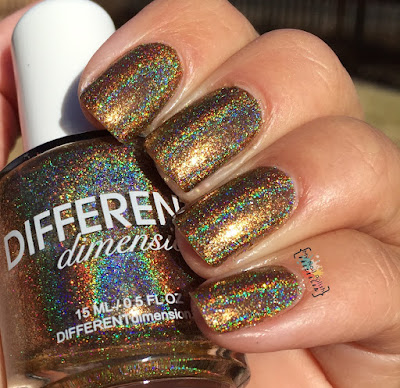
There are so many gorgeous colors in this collection but I have to admit Retrograde is my favorite.  This warm golden-brown linear holo is stunning.  Retrograde is full of gold holo glitters and iridescent flakies.  This is the brown to rule them all people!  Formula and application were both perfect.  I used 2 coats of Retrograde for full coverage and 1 layer of topcoat.  

Different Dimension Retrograde

Different Dimension Retrograde

Different Dimension Retrograde

Different Dimension Retrograde

Different Dimension Retrograde

 *indirect natural light*
Different Dimension Retrograde

*shade*
Different Dimension Retrograde

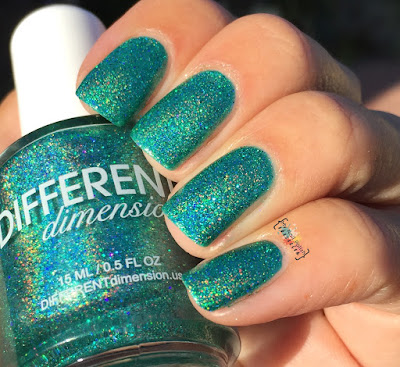
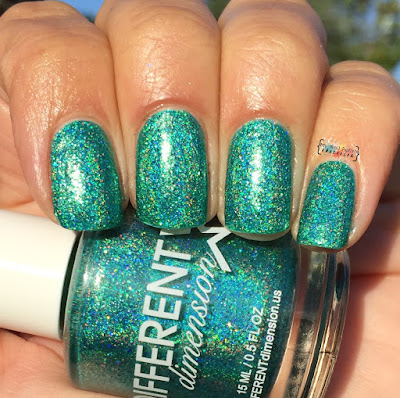
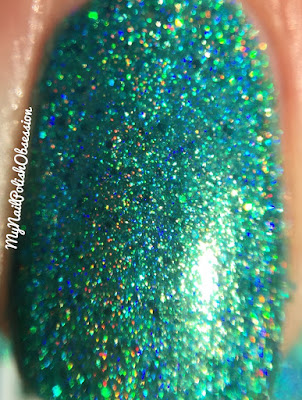
Rounding out the collection is Space-Time.  I love this aqua-teal shade, it's fun and wearable and very summery.  Along with being a linear holo, there are also tiny holo glitters and blue sparks.  The formula and application were both stellar - just like this entire collection, no issues to bring up.  I used 2 coats of Space-Time for full coverage.  1 layer of topcoat to finish it up!

Different Dimension Space-Time

Different Dimension Space-Time

Different Dimension Space-Time

Different Dimension Space-Time

Different Dimension Space-Time

 *indirect natural light*
Different Dimension Space-Time

Different Dimension will also have this nail art glass available in the shop on 8/1.  It's perfect to use as a watermarbling, nail art or brush cleaning.  Or you can use it for "other" purposes (hehe).  

Different Dimension Nail Art Cup

Pin It
Instagram